
Price range: $18.99 through $184.95
DTF Gang Sheet Builder
Product Details
Build Your Own DTF Transfers Gang Sheet
Use Our Online Gang Sheet Builder
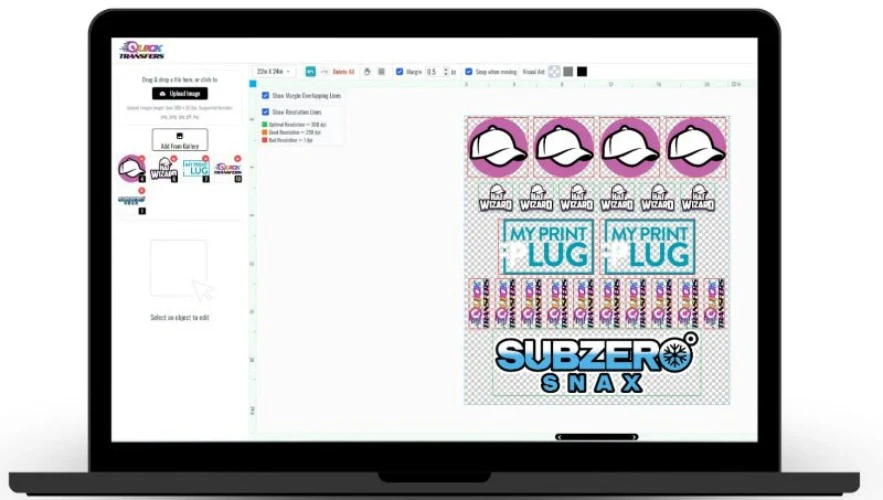
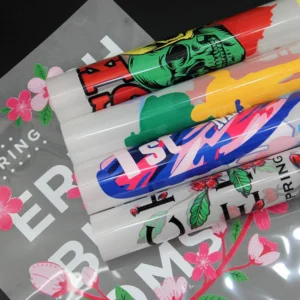
Create custom DTF gang sheets with ease using our powerful Gang Sheet Builder—right on our website! Whether you're printing for business or personal use, our builder allows you to upload and arrange multiple designs on a single sheet for maximum efficiency and creativity.
✅ Why Use Our DTF Gang Sheet Builder?
-
Easily combine multiple designs on one sheet
-
Reduce production costs by minimizing waste
-
Print vibrant, high-resolution images with incredible detail
-
Perfect for bulk orders, small businesses, and creative projects
Don’t see the size you need or can’t find the product you’re looking for?
Give us a call—we're happy to help and will assist you promptly.
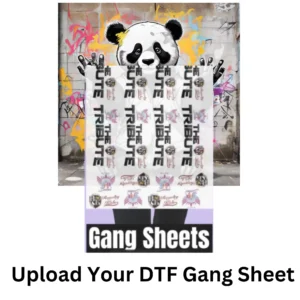
No Gang Sheet? No Problem.
We also offer Ready-to-Press DTF Transfers for those who prefer pre-designed sheets.
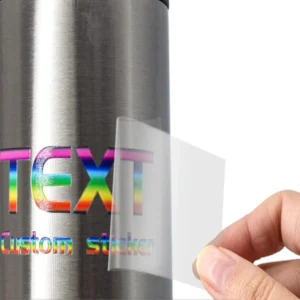
All of our DTF Transfers are printed on high-quality film and only require a heat press to apply. No weeding, no mess—just vibrant, durable results.
Features+
Print Any Design on Any Garment: Ninja Transfers DTF (Direct-to-Film) transfers are incredibly versatile, enabling vibrant and durable prints on any garment or material. Whether it’s cotton, polyester, blends, or even leather, our proprietary adhesive powder and high-quality inks ensure effective bonding with various fabric types.
Unmatched colors and fine detail: Our transfers deliver unmatched colors and fine detail, ensuring every design is vibrant and precise. Our technology excels in capturing fine lines, gradients, and intricate patterns with exceptional clarity, making even the most complex artwork come to life on any material.
Easy Application: Our transfers are quick and easy to apply, requiring no weeding or pretreatment. Simply position and press the transfer to achieve professional-quality results far faster than traditional methods.
Soft to the Touch: DTF transfers provide an amazingly soft hand-feel, resulting in a smooth and comfortable finish. Unlike vinyl transfers and DTG printing, which can leave a stiff or gritty texture, DTF transfers ensure a superior and comfortable finished product.
Tested to 100+ Washes: Our transfers are designed to maintain their quality and vibrancy through extensive washing, lasting up to and beyond 100 washes. This durability is a testament to our rigorous testing, ensuring our transfers stand up to everyday wear and tear.
Satisfaction Guarantee+
We stand behind the quality of every transfer and sticker we print. If you’re not completely satisfied, we’ll reprint your order with a new or revised file at no cost to you.
Pressing Instructions+
If you’re ordering any specialty transfers, click here to find the appropriate pressing instructions videos.
Click here to watch our DTF Transfer Pressing Instructions Tutorial Video.
To ensure your DTF transfer looks professionally pressed every time, follow these four simple steps.
1 – No Need To Pre-Press or Pre-Iron
Removing moisture and wrinkles from the product is unnecessary with Ninja Peel Transfers. Only do a prepress if you prefer.
2 – Position Your Design
Position your transfer in the desired location and make sure it is flat before pressing. You can press across seams, for example on 6-panel hats and side seams of t-shirts. Heat-resistant tape is recommended when pressing on hats or when using a household iron to prevent the transfer from moving. You’ll learn when it’s needed with experience.
3 – Press & Peel after a few seconds
Press the transfer at 310°F / 155°C with medium to high pressure for ~12 seconds. It is recommended to test one piece first. Use parchment paper or order Ninja’s Silicone Upper Platen Cover (avoids scorching and replaces parchment paper) to protect your garment from touching the iron directly.
Wait a few seconds and peel! If parts of the design are not sticking, lay it back down and press again with added pressure and heat (+15°F). If unsuccessful, increase heat by 15°F increments until it transfers correctly. Remember, the great thing with NinjaTransfers is that repeated pressing won’t damage the transfer.
If your settings are scorching the garment, the first step would be to reduce pressure. If that doesn’t work, retain the reduced pressure and reduce the heat by 10-15°F. With a little practice, you’ll find the right settings for each garment and material.
4 – Final Press & Wash Instructions
Important: While the majority of other DTF companies advise you to press it just once, this is improper. After hundreds of wash tests, we have found that a final press is imperative to create a superior product. After the design is transferred onto the garment, with the film peeled off, cover the design with provided parchment paper and press for 15 seconds. Doing so enhances the value of your product by greatly improving the durability and softness as well as reducing the shine.
For step-by-step pressing instructions for household irons or a Cricut EasyPress, click here.
Related Products
3D UV DTF Sticker Gang Sheet Builder
Price range: $24.95 through $214.95Need Help Designing Your Gang Sheet? Call or text: 516-703-9601Email images & questions: info@pandadtftransfers.com Take Your Sticker Game to the Next Level Create custom UV DTF stickers with our Design Your Gang Sheet service!If you don’t see the size or product you need, simply email us—we’ll respond promptly and help you get exactly what you’re […]
DTF Upload Your Own Gang Sheet
Price range: $15.99 through $189.95Upload Your Own Gang Sheet for DTF Transfers Can’t find the size you need or the product you want? Call us at 516-703-9601, and we’ll get back to you promptly. Thank you for choosing us for your custom apparel needs. Design Your T-Shirt with DTF Transfer Gang Sheets: Unleash Your Creativity! Revolutionize your T-shirt design […]
DTF Transfers By Size
Price range: $1.99 through $14.99Print Any Design on Any Product, Material, Size, or Color—With Exceptional QualityBring your ideas to life with DTF Heat Transfers by Size, delivering vivid, durable colors that pop on every print. Whether you’re using a home iron or a professional heat press, our transfers ensure vibrant, long-lasting results that showcase your creativity. Perfect for T-shirts […]

Funny and Sarcastic DTF Gang Sheet 22.5 in x 60 in (For 9 Shirts)
$28.95Unleash your humor and showcase your sarcastic side with our Funny and Sarcastic DTF Gang Sheet! Sized at 22.5 inches by 60 inches, this sheet is perfect for infusing your space with personality. Let your DTF gang flag fly.
Revolutionize your crafting game with our Pre-Made DTF Gang Sheets! Explore a realm of limitless creativity and effortless design with these carefully curated sheets, meticulously crafted to enhance your printing experience. Each sheet is a work of art, boasting vibrant, high-definition designs that will breathe life into your projects. Bid farewell to the hassle of starting from scratch and embrace the convenience of our ready-to-print gang sheets. Whether you’re a seasoned crafter or a beginner, these sheets are your gateway to stunning results with minimal effort. Unleash your imagination and let your creations shine with our Pre-Made DTF Gang Sheets.